Background
This article was first published on the Microsec website in January 2013.
We have been supporting and maintaining a customer’s inspection management system for several years. This consists of a Sybase SQL Anywhere version 9, backing an ASP.NET web-based management application, with on-site inspections being managed on Windows Mobile devices. Core to the technology is the synchronisation of data between the server database and the handhelds – and this is achieved using Sybase’s excellent Mobilink system – keeping an Ultralite database on the handheld in line with the server database.
A Dead Development Tool – What Next?
The Windows Mobile application was written using Crossfire from AppForge. Unfortunately AppForge went out of business in 2007, leaving developers with no ability to update their software (the software required live activation of a development licence).
The obvious solution was to rewrite the application to remove the dependency on Crossfire – but if we were going to rewrite – for which platform and using which tools?
Enter Mono
To keep our options open regarding platform, we elected to use Mono For Android, from Xamarin – this would give us the ability to support the application on Android, iOS and Windows Mobile. As our main skills are .NET/C#, this was a good fit.
The New Challenge – Ultralite for Mono For Android?
Sybase produce libraries for .NET, Android and iPhone – excellent. However, the .NET libraries are not compatible with Mono, as it uses a subset of the .NET assemblies, and does not include some of those required by Ultralite.NET. What to do?
Mono For Android Bindings Library To the Rescue
With the release of Mono For Android 4.2, Xamarin introduced a Java Binding Library project, which makes it easy to create a managed code (i.e. C#) wrapper for java libraries (.jar files). This proved to be the solution. There’s a full tutorial on how to use Bindings Libaries here, but I’m going to describe the steps I had to go through to get the Ultralite library bound and usable in an application.
Building The Ultralite Binding Library
So how to build a binding library for Ultralite?
Install Mono For Android
Naturally, we needed Mono For Android – Xamarin provide a trial version, which allows development and testing on an emulator. It’s fully featured, but won’t allow deployment to a physical device.
Create The Library Project
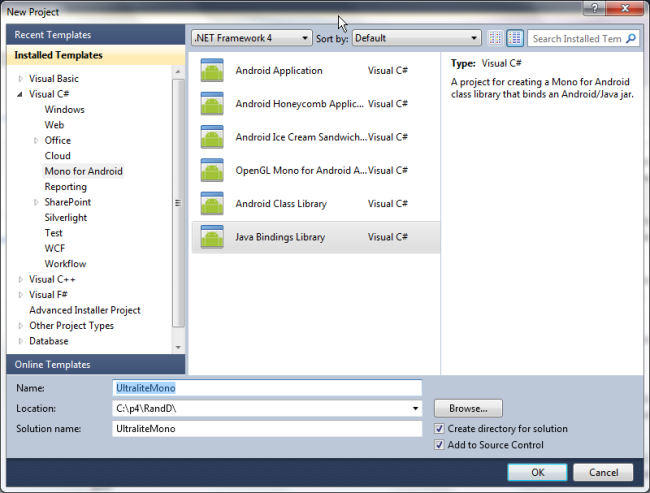
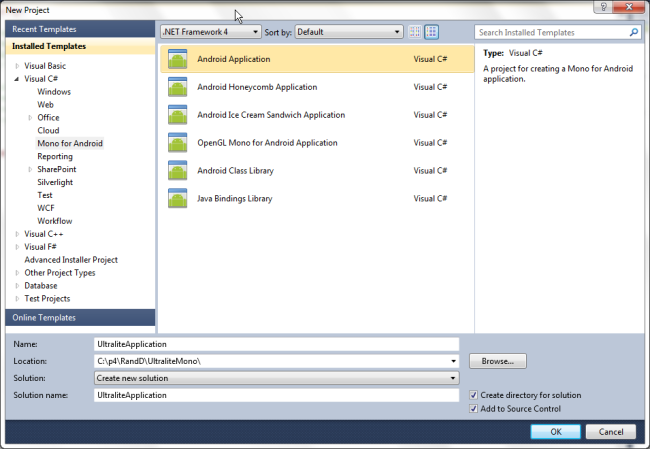
Once we had Mono For Android installed, the first step – not surprisingly – was to create the library project. Starting Visual Studio and selecting New Project now gave a set of templates for Android. One of these was a Java Bindings Library. So I created one of these:
Add The Ultralite Java Library
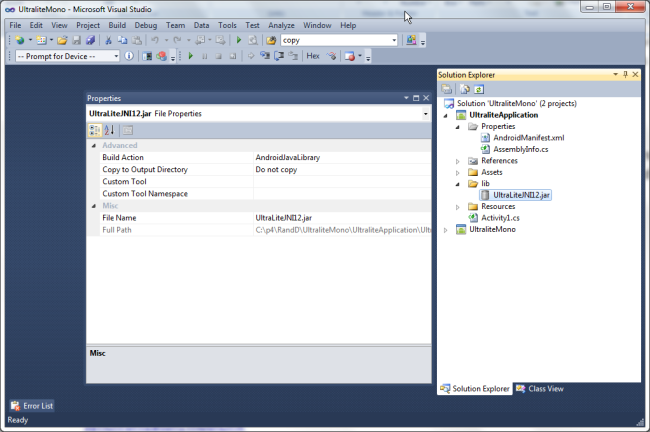
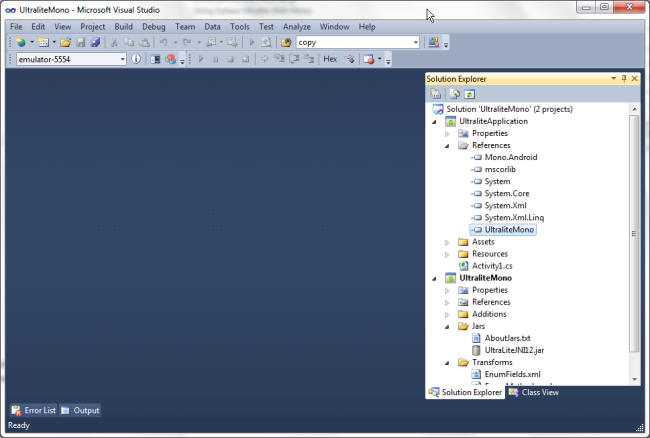
The next step was to add the jar file to the jars folder in the project.
The Build Action for the jar file needed to be set to InputJar – this tells Mono For Android that it’s the jar file to be bound.
Build the library And Resolve API Differences
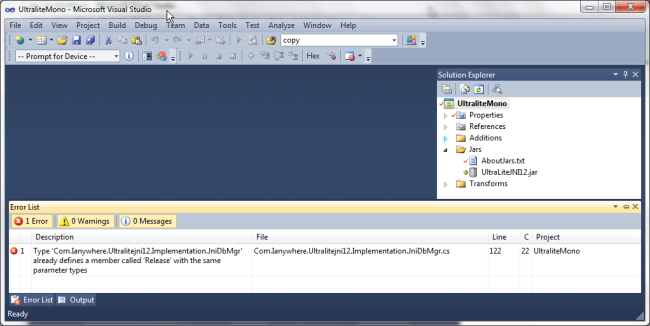
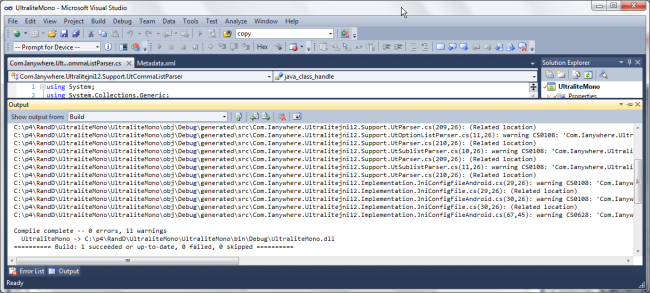
So we had the jar file added – time to build the library. Here’s where we hit a problem – we got an error on the build, regarding a duplicate member for the library.
What to do? Well, a bindings library project has three transform files:
- EnumFields.xml – Maps Java int constants to C# enums.
- EnumMethods.xml – Allows changes method parameters and return types from Java int constants to C# enums.
- MetaData.xml – Allows changes to be made to the final API, such as changing the namespace of the generated binding.
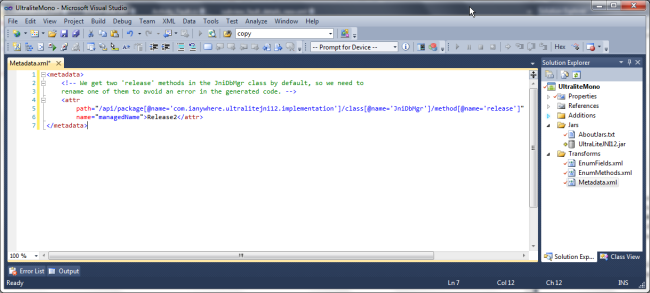
The solution was to rename one of the Release members to resolve the duplicate, using the Metadata.xml transform file.
Now the library built with no errors.
Note that I’ve only touched the surface here with what can be done with the transform files. A full description is available on the Xamarin website here.
Using The Library In An Application
Create An Android Application
Now that the library built OK, it was time to put it to use. Not surprisingly, the first task was to create a simple Android application.
Add A Reference To The Binding Library
As you’d expect, the next step was to add a reference to the Ultralite library.
Add The Library Files To The Application Project
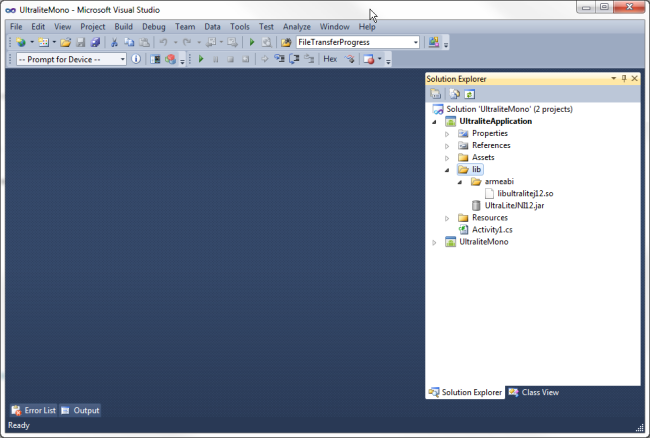
As well as adding a reference to the library project, the application must also include the java library and the native library, which the java library uses, for deployment to the device.
To do this, I had to add the following.
- UltraLiteJNI12.jar with a build action of AndroidJavaLibrary
- libultralitej12.so with a build action of AndroidNativeLibrary. This needed to be put in a folder named to match the device’s architecture.
Using The Library
To test the library, I took the standard Mono For Android application template, which produces a screen with a button which, when clicked, updates with a count of the number of times it has been clicked. I then amended the code to create a database, create and add some records to an Employees table, and display the number of records when the button is clicked.
The amended Activity1.cs code is below.
using System;
using Android.App;
using Android.Content;
using Android.Runtime;
using Android.Views;
using Android.Widget;
using Android.OS;
using Android.Util;
using System.Text;
// Reference the Ultralite library namespace
using Com.Ianywhere.Ultralitejni12;
namespace UltraliteApplication
{
    [Activity(Label = "UltraliteApplication", MainLauncher = true, Icon = "@drawable/icon")]
    public class Activity1 : Activity
    {
        // Database connection for the Ultralite database
        IConnection DBConnection;
        protected override void OnCreate(Bundle bundle)
        {
            base.OnCreate(bundle);
            // Set our view from the "main" layout resource
            SetContentView(Resource.Layout.Main);
            try
            {
                IConfigPersistent Config;
                IPreparedStatement PreparedStatement;
                // Create a configuration for the connection - parameters are the database name and the Android context
                Config = DatabaseManager.CreateConfigurationFileAndroid("UltraliteMono.udb", this);
                // Connect to the database - CreateDatabase creates a new database
                DBConnection = DatabaseManager.CreateDatabase(Config);
                // Create an Employees table
                PreparedStatement = DBConnection.PrepareStatement("CREATE TABLE Employees (ID tinyint DEFAULT autoincrement NOT NULL,firstname varchar(30) NOT NULL,lastname varchar(30) NOT NULL,email varchar(100) NULL,PRIMARY KEY ( ID asc ) )");
                PreparedStatement.Execute();
                // Insert some data into the table
                PreparedStatement = DBConnection.PrepareStatement("INSERT INTO Employees (firstname, lastname, email) VALUES ('James','Lavery','james@microsec.co.uk')");
                PreparedStatement.Execute();
                PreparedStatement = DBConnection.PrepareStatement("INSERT INTO Employees (firstname, lastname, email) VALUES ('Joe','Bloggs','joe@microsec.co.uk')");
                PreparedStatement.Execute();
                PreparedStatement = DBConnection.PrepareStatement("INSERT INTO Employees (firstname, lastname, email) VALUES ('Ethel','Aardvark','ethel@microsec.co.uk')");
                PreparedStatement.Execute();
                DBConnection.Commit();
            }
            catch (Java.Lang.Exception ex)
            {
                // Log any errors to the device debug log
                Android.Util.Log.Error("UltraliteApplication", string.Format("An error has occurred: {0}", ex.Message));
            }
            // Get our button from the layout resource,
            // and attach an event to it, to retrieve the number of records in the Employees table
            Button button = FindViewById<button>(Resource.Id.MyButton);
            button.Click += delegate
            {
                IPreparedStatement PreparedStatement;
                int EmployeeCount;
                IResultSet ResultSet;
                PreparedStatement = DBConnection.PrepareStatement("SELECT count(*) FROM Employees");
                ResultSet = PreparedStatement.ExecuteQuery();
                if (ResultSet.Next())
                {
                    EmployeeCount = ResultSet.GetInt(1);
                }
                else
                {
                    EmployeeCount = -1;
                }
                button.Text = string.Format("There are {0} employees in the database. ", EmployeeCount);
            };
        }
    }
}
The Running Application
Running this application in the emulator gives the opening screen.
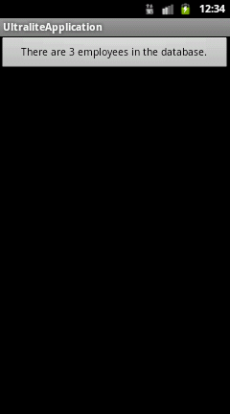
And clicking the button indeed gives the count of Employees in the Employees table.
Summary
Taking a 3rd-party java library and binding it so that it can be used in Mono For Android proved to be pretty straightforward. Crucially, it allowed us to use an existing database and synchronisation model with our new Android application – all we now needed to do was code the user interface.

